Monday 7 October 2013

Satay Tofu

About as decadent as veganism can get. Fried firm tofu, crispy on the outside but jelly-like on the inside, topped with rich coconut, peanut butter and lime sauce, resting gently on piles of plain boiled rice and simply stir-fried bok choi. I'm glad I went for an extra 20km cycle ride today!

Wednesday 4 September 2013

Silken Tofu with Ginger and Spring Onions

For years I have struggled to use silken tofu correctly. I've made some good brownies, and some utterly terrible ones. I've lost the stuff in a stir fry more times than I can count. I bought a packet the other day and vowed to find a way to use it. I remembered a few months ago reading that you can tell a Japanese restaurant by their agedashi tofu, in the same way you can tell an Indian restaurant from its butter chicken. And I thought -- hmm, that's served cold, right? Maybe I can use the silken tofu. Turns out, you can, and it's fantastic. Very different from crispy fried firm tofu, but delicious in its own right. Probably not for you if you don't like jelly-like textures; it was like a thick set custard but with a grassy, light flavour. Worked really well with some tempura'd veggies and simple cucumber sushi.

Ingredients
  • 3-4 spring onions
  • half a thumb of fresh ginger
  • light soy sauce
  • one packet of silken tofu, drained
Trim, tail and finely slice the spring onions cross ways. Peel, then grate or finely chop the ginger. Fry gently with the spring onions for 3-4 minutes, until softened and golden. Slice the tofu lengthways into two large rectangular pieces. Top with the fried ginger and spring onion and drizzle with soy sauce. Serve!

    Wednesday 21 August 2013

    Homemade Chocolate-Chip Ice Cream

    I must write up my mint ice cream, but in the meantime, here is a very successful vanilla, which we (of course) spiced up by adding shaved 70% dark chocolate. Totally yum yet strangely elegant.

    Ingredients
    • 1/2 cup whole milk
    • 1/3 cup granulated sugar
    • pinch of salt
    • 1 cup thickened cream
    • 1 tbsp vanilla extract
    • dark chocolate
    Chill the ingredients well, then pour into the ice cream maker and mix until thickened. Freeze again for 3-4 hours, then churn again and serve, topped with finely chopped or grated dark chocolate.

    Thursday 1 August 2013

    Yorkshire Puddings

    I love Yorkshire puddings. When I was a child we always looked forward to when my mum would make them. We'd beg and beg for more of them, even above and beyond roast potatoes! Pure carby goodness. It seems the tricks to getting a well-puffed pudding are to beat the batter well to get air into it, and to heat a generous amount of oil in tin (in the oven) before you pour the  batter in -- and always less than half of the height of the tin, or they won't have room to expand. I was surprised that the Joy of Cooking said to beat the batter, since I would normally worry about toughening the gluten, but it worked very well. And luckily, they were wrong about needing to leave it to stand for an hour. (I'm impatient like that!)

    Ingredients
    • 1 cup plain flour
    • 1/2 tsp salt
    • 1/2 cup milk
    • 1/2 cup water plus 1tbsp
    • 2 eggs
    • vegetable oil
    Preheat the oven to 200 C. Combine the salt and flour, make a well in the centre and pour in the milk and water. Stir, then beat well until very combined. Add the two eggs and continue to beat until large bubbles rise to the surface. Pour a little vegetable oil into each tin of a muffin tray and place in the hot oven; there should be enough oil that the base of each tin is easily covered. After five minutes, remove the tin from the oven and pour the batter into each cup, to about 40% of the height of the tin. Return to the oven and bake for about 20 minutes, until risen and golden.

    Saturday 15 June 2013

    Katsudon Sushi

    What better way to say goodbye to your lovely husband the night before you fly off again to yet another conference, than to make a huge plate of katsudon sushi? Unless you're feeling very patient, you'll need some leftover katsudon; cut into long strips along with some avocado, and lay out on sushi along with a thin drizzle of mayonnaise. Wrap and serve, preferably with some hot wasabi.

    Sunday 2 June 2013

    Nigel's Roast Pork Belly

    I'm spending most of this winter travelling and working really hard, so not too many updates for the next couple of months. But here's a winter warmer we took the time to make on a rainy Sunday, and which then fed us for the rest of the week. A good recipe, although you really need to take it easy on the orange; a little zest goes a long way, when it's inside the meat and isn't evaporated off by the oven!


    Friday 31 May 2013

    Wagamama Week: Yasai Korroke

    At last! A successful recipe - something I might try again! Shame the ingredients list will be the longest I have ever posted :) I have given up revising their quantities in the ingredients list, and just written the ones that I used. For once the original recipe didn't make enough food, and while I'm willing to try making too much, I'm not willing to go hungry for the sake of following the recipe!

    Ingredients:
    Amai sauce:

    • 1tbsp malt vinegar
    • 3 tbsp sugar
    • 1 tbsp light soy sauce
    • 1 tbsp dark soy sauce
    • 1 1/2 tbsp tomato ketchup
    • 2 tsp tamarind paste

    Salad dressing:

    • 1 tsp finely chopped shallot
    • 1/2" piece of fresh ginger root, peeled and grated
    • 1 tbsp rice vinegar
    • 1/2 tbsp tomato ketchup
    • 50ml vegetable oil
    • 1 1/2 tbsp light soy sauce

    Vegetable cakes:

    • oil for deep-frying
    • 2 large potatoes
    • 1 medium sweet potato
    • 50g frozen peas
    • 75g tinned sweetcorn, drained
    • 1 small onion
    • 1 red chilli
    • 3-4 tbsp plain flour
    • 1 egg
    • 75g fine breadcrumbs

    Salad:

    • half a bag of mixed salad
    • 1/2 red pepper
    • 10g dried wakame

    Microwave the vinegar, sugar and soy sauce until the sugar has dissolved, then whisk in the rest of the amai sauce ingredients and set aside to cool. In a separate bowl, whisk together the salad dressing ingredients and set aside as well.

    Peel and chop the potatoes, and sweet potatoes. Boil the potatoes for 12 minutes; add the sweet potatoes after 3-4 minutes so they are done at the same time. Drain very well, and cover with a teatowel to absorb the moisture. When reasonably dry, mash roughly with a fork, then stir in the peas and sweet corn and set aside to cool.

    Meanwhile, peel and finely chop the onion, and trim and deseed the chilli (or leave the seeds in, if you like the kick). Fry in a few tbsp of vegetable oil at a low heat, until soft and fragrant. Stir into the potato mixture. Using your hands, form the mixture into small cakes, and then dip into the flour, the egg, and then the breadcrumbs, and deep-fry at 180C for 4-5 minutes until crisp and golden. If the cakes are too fragile, chill them for an hour and then fry them slightly longer.

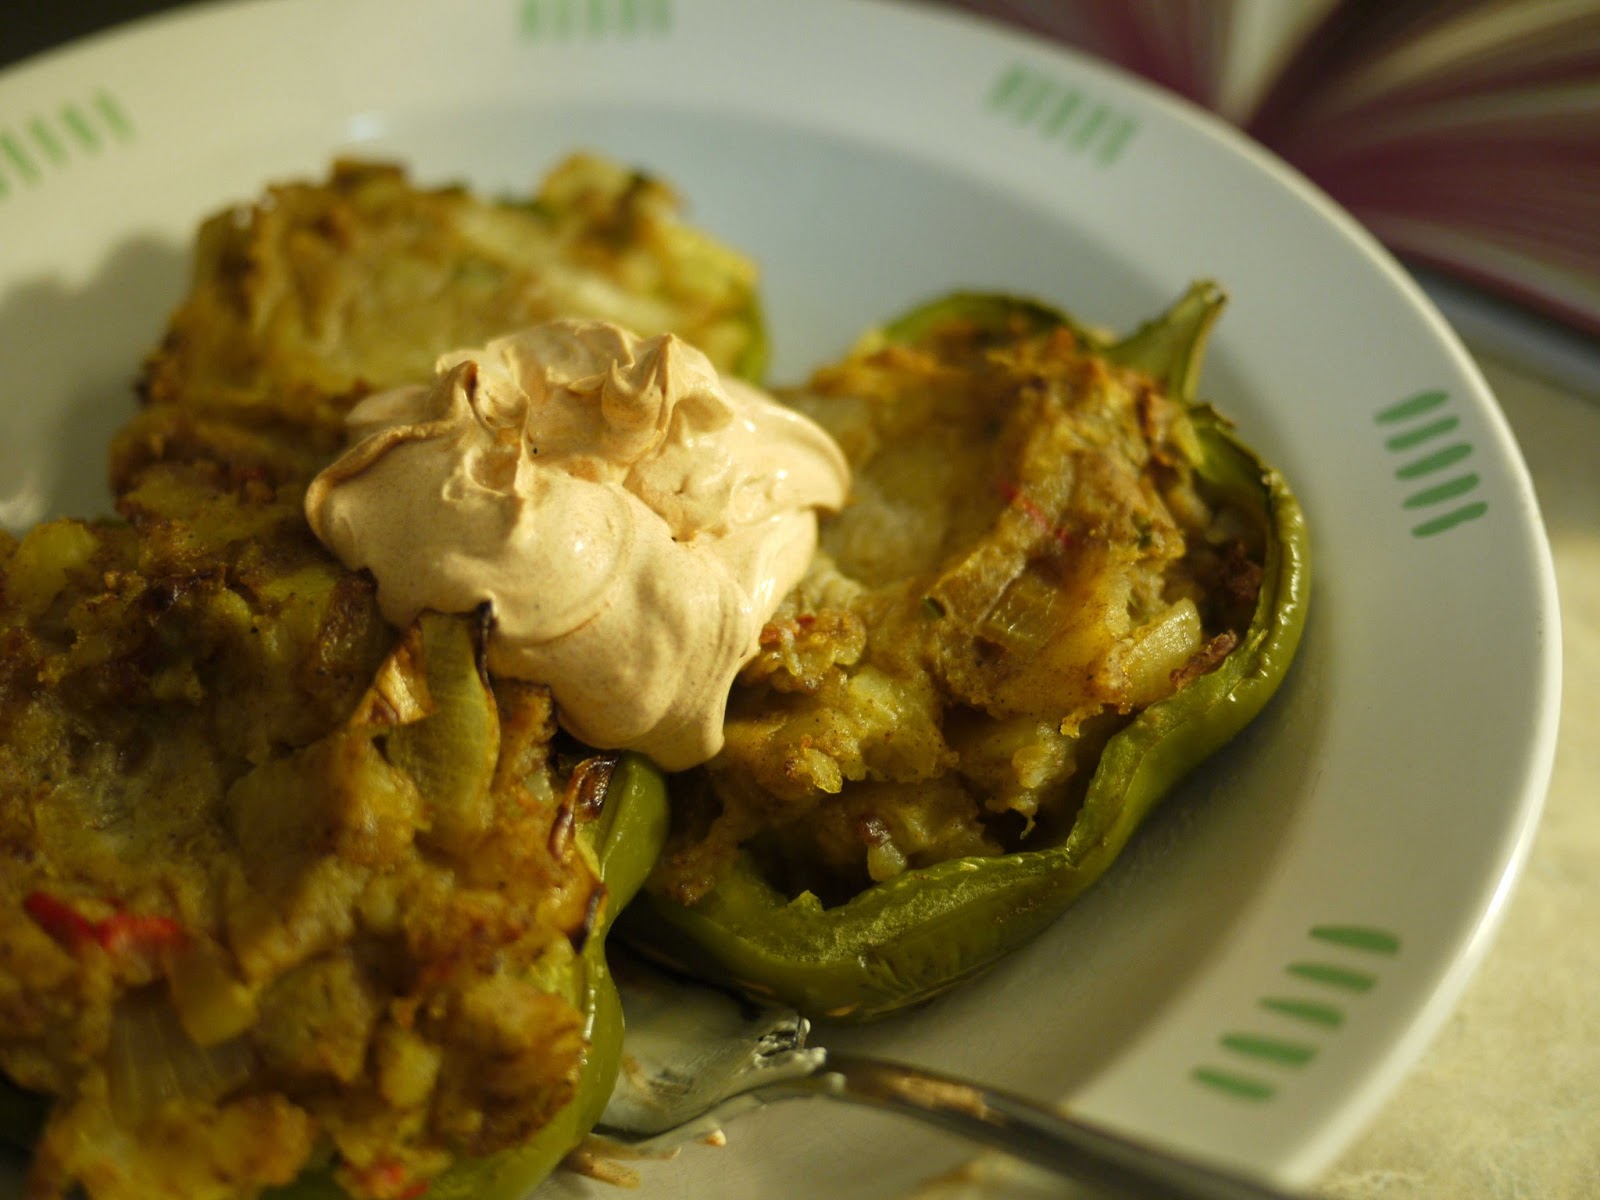
    Meanwhile, finely-slice the red pepper and rehydrate the wakame. Toss with the salad leaves and dressing, then serve the cakes on top of the salad.

    Verdict:
    Ahh, this was a breath of fresh air. Crisp, delicate vegetable cakes that were surprisingly light and more complex than the sum of their parts. A salad dressing that looked thoroughly unappetising and unbalanced, but shined when combined with the crisp red pepper and earthy seaweed. I couldn't keep track of the quantities I adjusted this time: they suggested 50g of dried wakame go into the salad... that would be like one of the serving bowls entirely filled with wakame. And while this recipe nestles happily in the middle of the vegetarian main meal section, where the recipes seem balanced for 3-4 people despite being advertised for two, the original would only just have fed one. Strange book; it's like they went into the kitchens and tried to guess what quantities of raw ingredients went into each meal, rather than asking one of the chefs.

    Thursday 30 May 2013

    Wagamama Week: Marinated Vegetable Ramen

    This was an interesting recipe, using a cooking method I'd never seen before: marinating the vegetables *after* they'd been cooked. I would write it out but... I'll skip straight to the verdict. It's a waste of time. Don't. If you're going to marinade things, marinade them before you cook them. ESPECIALLY if the marinade consists of raw garlic and chilli. These are ingredients that LIVE to be cooked. Once again the quantities were absurd: we had more than enough for lunch the next day, even though neither of us were keen on the idea. And the lovely fragrant ramen noodles, so yummy when cheekily tested for doneness straight from the pot, were completely buried under the raw marinade, which even overwhelmed a fairly tasty vegetable stock.
    Even the photo was bad!

    Wednesday 29 May 2013

    Wagamama Week: Pumpkin Curry

    I am a big fan of pumpkin curry; the sweet, earthy, melting flesh works amazing well with warming spices, and somehow becomes even more flavoursome when cooked nearly to destruction, unlike, say, the potato. I have two pumpkin curries I commonly cook, along with 101 other pumpkin-related recipes. So I was certainly willing to road-test the Wagamama version, which they claim was a one-off special that became so popular, it was added to the main menu.

    Ingredients (Quantities in brackets are my revised suggestions):

    • 100g brown rice
    • 1 clove of garlic
    • 1/2" piece of ginger root
    • 1/2" piece of galangal root
    • 2 lemongrass sticks
    • 300ml hot water
    • 1/4 tsp salt (1 1/2 tsp)
    • 1 tsp sugar (3 tsp)
    • 100g canned coconut milk (140g)
    • 1 small pumpkin (1/5th of a Japanese pumpkin - about 400g)
    • 2 courgettes (1)
    • 6 button mushrooms (12 or 0)
    • 4 baby sweetcorn
    • handful of sugarsnap peas
    • 4 x 1" cubes of tofu (don't bother)
    • 2 handfuls of baby spinach (don't bother)
    • handful of chopped coriander
    Set the brown rice cooking according to its packet instructions.

    Peel and grate or finely dice the garlic, ginger, galangal and lemongrass, or whiz in a little blender until a fine paste (you'll probably have to double or triple the quantity to get enough friction for a blender to work). Fry in a good glug of vegetable oil over a moderate heat for 6-8 minutes, stirring until softened and fragrant but not coloured. Add the hot water, bring to the boil, then add the salt and sugar; simmer for 20 minutes until reduced by half (I had to cover mine, as it reduced much more quickly than that.)

    Meanwhile, peel and deseed the pumpkin, and cut into bite-size chunks. Scoop the seeds out of the middle of the courgette and cut into bite-size chunks. Halve the mushrooms and sweet corn. Stir fry the vegetables for 2 minutes -- I let mine rest occasionally so they picked up a bit of colour. Stir the coconut milk into the reduced sauce and then pour over the vegetables, add the tofu if using, then simmer for 15-20 minutes, or until the pumpkin is tender. Serve the curry with the drained rice, sprinkled with the chopped coriander.

    Verdict:
    Not bad. Nowhere near as good as either of the two curries I already know, but ok. The quantities they suggested were distressingly large for two people; I couldn't help but scale back the quantity of pumpkin (from a whole one to 1/5th of one!) and we still had enough left over for lunch the next day. The tofu didn't stand up to the treatment it was given; I definitely prefer mine fried to give it some bounce and crunch. I don't know what the spinach was for... looking pretty in their photo? And having all of those different vegetables in there made the curry lack focus; it was a bit too much of a jumble. I'd say either up the mushrooms, or take them out altogether. The sauce was extremely under-seasoned. I would add half a red chilli if you like a bit of spice, and the sugar and salt quantities given were insufficient by a factor of 2-3. I'm glad I used the full tin of coconut milk; their suggested quantity wasn't coconut-y enough. It also felt weird to eat a curry that had no spices in it.

    Tuesday 28 May 2013

    Wagamama Week: Rice Noodle Soup

    We used the leftover konbu and katsuobushi from making yesterday's dashi to make a second dashi stock for this recipe, which did indeed taste stronger and more interesting than the primary stock. Unfortunately, the subtle notes were buried under an avalanche of miso...

    Ingredients (Quantities in brackets are my revised suggestions):
    • 150g rice noodles
    • 500g tofu block, cut into small steaks (400g)
    • 2 tbsp miso paste (1/4 tsp -- not a typo!)
    • 1/2 tsp shichimi (1 1/2 tsp)
    • 1 tbsp vegetable oil
    • handful of roughly-chopped choi sum
    • 2 spring onions, trimmed and sliced
    • 1 litre miso soup (600 ml)
    • small handful of coriander
    Cook the rice noodles according to the packet instructions. Lightly blot the tofu steaks with kitchen paper. Combine the miso paste with the shichimi and spread over the tops, then fry on a hot griddle, miso-side up, for 6-8 minutes or until the tofu is hot and the base is crispy. Remove the steaks to a warm plate and fry the choi sum and spring onions on the griddle for a minute, until just wilted. Serve the noodles topped with choi sum topped with tofu, with miso soup ladled over.

    Verdict:

    The tofu stands up to the frying nicely, much better than yesterday's mushrooms. But:

    WHOA. MISO. SO MUCH MISO. MORE MISO THAN MY TASTE BUDS HAVE ROOM FOR.

    Seriously, 2 tbsp of raw miso paste on your tofu is just too rich. I think you want just enough to stick the shichimi to the tops of the tofu... which on balance I prefer fried on both sides, for maximum crispiness. It's also important to serve this right away, since the crispy base immediately starts sogging underneath the stock, of which there is a ridiculous quantity in the original recipe.

    Monday 27 May 2013

    Wagamama Week: Ginger Chilli Mushrooms

    Years ago, I bought my friend a copy of The Wagamama Cookbook and posted it to him for his birthday. Unbeknownst to me, he had also posted me a copy, so they arrived at almost the same time :) I've occasionally used recipes from it, but early in my cooking career, I didn't have many of the exotic-seeming Japanese ingredients, so stuck to the simplest recipes. Opening my closet now, I find I have almost everything I need, so thought I'd get stuck in by trying the first seven vegetarian recipes in the book, one by one. Otherwise, I'd never have been able to pick - they all look so yummy!

    I went through each one and wrote down what I needed - the only new storecupboard ingredient was konbu for making dashi, as the store I go to doesn't have dashi no moto, even though that's what Wagamama use ;) Writing down exactly what I needed made shopping strange - I don't think I've ever gone to the store looking to buy '4 carrots' instead of just 'carrots'. And it had the unfortunate side-effect of making me completely forget about lunch ingredients. On the plus side, I know I spent almost exactly $100, and in theory I will be out of food in exactly one week's time.

    So to kick off the week, the brave SO started with one of the simpler recipes while I went to Zumba. It's nice when someone else suffers for your art ;)

    Ingredients (Quantities in brackets are my revised suggestions):
    • 250g soba noodles (150g)
    • 3 tbsp vegetable oil
    • 1 red chilli, trimmed, deseeded and finely sliced
    • 2 tbsp peeled and grated fresh ginger root
    • 4 (king) oyster mushrooms, cut into 1cm slices
    • 4 shiitake mushrooms, cut into 1cm slices
    • clump of enoki mushrooms, about the size of your first, broken up
    • handful of roughly chopped choi sum
    • 1/2 tsp salt
    • 1 tsp sugar
    • generous handful of beansprouts
    • 600ml miso soup (500ml)
    • 4 spring onions, trimmed and sliced
    • 2 sprigs coriander
    Cook the noodles in a large pan of boiling water for 2-3 minutes, then drain and divide between two bowls, dropping the beansprouts on top. In a large hot wok, fry the chilli and ginger in the vegetable oil for 15-20 seconds, then add the mushrooms, choi sum and spring onions. Season with salt and sugar, and stir fry for 2-3 minutes.

    Spoon the stir fry over the beansprouts and noodles, and ladle over the hot miso soup. Scatter with coriander and serve.

    Verdict:

    This was a pretty nice combination. The mushrooms lent a sort-of earthiness which was balanced well by the warming ginger and chilli, and the umame miso soup. We did feel like there were too many noodles; we ended up saving about 1/3 of the whole meal for one person's lunch the next day. I think 150g would be a more sensible amount. The mushroom pack we bought had a king oyster mushroom in it, and that stood up to the stir frying considerably better than the oysters and enokis, which basically vanished. I would switch to just using king oyster and shiitake, or even chestnut mushrooms, or add the enokis and oysters only 1 minute before serving. Lastly, the flavours were balanced, but a bit samey. I'd serve this with a hot lemon tea, or a lemonade, to try to bring in some contrasting sourness, as it's missing that note entirely.

    Friday 24 May 2013

    Buffalo Chicken, Blue Cheese Carrot Slaw and Corn Bread

    When I was little, we used to have buffalo wings, but I was too young to really enjoy the spicy sauce. Now I've found out what I'm missing, and I will be making this again! I used this authentic recipe to coat a simply-grilled chicken breast, and served it with a couple of julienned carrots slathered in a blue cheese dressing, and some yummy cornbread (halving the sugar).

    Thursday 23 May 2013

    Open Moussaka

    We had some nasu dengaku earlier in the week, but weren't hungry enough to eat the entire massive aubergine. Tonight I had a strong craving for the flavours of moussaka, but didn't want to leave the oven on for an hour and a half during peak electricity cost, nor wait that long to eat dinner. So I tried out a somewhat crazy idea: making all the bits of a moussaka but skipping the fattiest parts and the long baking time. It actually worked really really well! The only thing that made it difficult was that grilling the topping at the end makes the plate too hot to handle!

    Ingredients:

    ...and it gets harder to take an attractive photo ;)
    • half a large aubergine
    • three potatoes
    • one medium onion
    • 300g lamb mince
    • 2 cloves of garlic
    • 1/2 glass of red wine
    • 2 tbsp tomato puree
    • one tomato
    • a small handful of parsley
    • 1/2 tsp cinnamon
    • 1/4 tsp allspice
    • 2 tbsp butter
    • 2 tbsp flour
    • 150ml milk
    • a bay leaf or two
    • 1/2 slice of bread
    • a small handful of grated cheddar

    Slice the aubergine lengthwise into four, brush with oil and BBQ or grill for 4-5 minutes each side, until caramelised and tender. Scrub and cube the potatoes, then set boiling, and drain and mash when done.

    Finely chop the onion and fry for five minutes, then crush in the garlic and add the lamb, and fry until the lamb goes brown, about 4 minutes. Finely chop the parsley and tomato and add, along with the wine, tomato puree, cinnamon and allspice. Stir and season, then cover and simmer for 20 minutes, until thickened and tasty.

    Meanwhile, melt the butter, combine with the flour and gently whisk in the milk; drop in the bay leaves and microwave for 4-5 minutes, stirring every minute, until thickened. Blend the bread into breadcrumbs and combine with the grated cheese.

    Assemble the moussaka by spreading a layer of mashed potato onto the bottom of the plate, then topping with the lamb mixture. Pour half of the white sauce onto the lamb mixture, add the cooked slices of aubergine, then top with the remaining white sauce. Sprinkle over the cheese and breadcrumbs. Grill for 1-2 minutes, until the breadcumbs are golden and the cheese has just melted.

    Wednesday 22 May 2013

    Chick Pea, Chorizo and Orange Salad

    I spent most of last week sleeping and reading, trying to shake off a nasty cold. As a result we hadn't worn down the food stores quite as much as usual, so this week I'm attempting to cook entirely using whatever I have left in the fridge from last week. OK - I definitely cheated here, as there was a HUGE bag of red peppers going cheaply at the grocers' when I popped into the park centre to buy milk, and I did have to top up the onion supply. Now that I've made this salad, I think it's actually worth going out to get the ingredients, as it was amazing! No internet link this time; I just had ingredients I needed to use and found the right flavours to link them together.

    Ingredients:
    • one tin of chick peas
    • one medium white onion
    • 1/2 tsp sugar
    • a handful of green beans
    • a small handful of raisins
    • a fat, spicy chorizo sausage
    • two roasted peppers, skinned
    • an orange
    • a small handful of mint
    • 1 heaped tsp dijon mustard
    • 1 1/2 tbsp white wine vinegar
    • 3 tbsp olive oil
    Drain the tin of chick peas and tip into a salad bowl. Thinly slice the onion into slivers, and fry over a very low heat until golden, translucent and falling apart - about 12 minutes. Add the sugar and cook for a further minute, then tip out of the pan onto the chick peas. Meanwhile, top, tail and blanch the green beans and raisins, then drain and add to the salad bowl.

    If the skin of the sausage is tough, skin it, then finely slice the sausage and fry in the onion pan for a couple of minutes, until crisping up and colouring. If you like, blot the excess fat with kitchen paper before adding to the salad bowl. Slice or tear the peppers into strips and add to the bowl. Using a sharp knife, cut the peel and pith from the orange, then segment into the bowl; squeeze out the core over the bowl to retain all of the lovely juices. Finely chop the mint and add to the bowl.

    Whisk the remaining ingredients together to form a dressing, pour over the salad, toss well and serve immediately.

    Thursday 16 May 2013

    Beetroot Risotto

    I'm going to be lazy and link my usual risotto recipe. This was exactly the same, but I boiled a few small beetroots for 40-50 minutes, until they were perfectly tender. Slipped out of their skins, cubed and stirred through right at the last minute, they made a beautiful addition to a risotto base, with a little feta and a generous squeeze of lemon juice.

    Tuesday 14 May 2013

    Roast Pumpkin and Pear Soup

    I've come down with a cold after working in Melbourne for a week, so need nice bland comfort food to cheer me up. Yesterday the SO made an excellent chicken soup, which I always crave demand the first day I have a cold. Today I needed more soup, and I was inspired by Really Not Wanting to Go Shopping, so Googled what we had in the fridge, and found this recipe. It sounds like a completely bonkers combination, but somehow, it works perfectly! I put the oven on, asked the SO to cut up a huge wedge of pumpkin, then slumped under a duvet while everything roasted. A little work with the blender and, bam,  comfort food.

    Ingredients:


    • 1/5 large pumpkin -- about 400g
    • a pear -- doesn't have to be ripe
    • 1/2 tsp cinnamon
    • chicken or vegetable stock
    • dukkah -- substitute with toasted, salted sesame or sunflower seeds if you can't get hold of it
    • sour cream

    Preheat the oven to 220C. Peel and cut the pumpkin into 1-2" chunks. Halve and core the pear. Put the pumpkin and pear in a large roasting dish - preferably with the pear skin-side down with a little room around it, and the pumpkin in a nice big pile. Drizzle the pumpkin with a little vegetable oil and dust the cinnamon over the top of the pears. Roast for 35-40 minutes until the pumpkin is tender right through, and the pear is soft and caramelised. Blend the pumpkin with enough hot stock to make a soup of your desired consistency -- probably about 200ml. Serve the soup topped with dukkah, half a roasted pear, and a generous blob of sour cream.

    Sunday 12 May 2013

    Baked Greek-Style Beans (and some Dolma)

    I had a strong craving for dolma after visiting a nice little Greek cafe for lunch while I was in Melbourne. I tried making my own, following a random recipe online. They had included the prep time, but cheekily didn't mention that they had their own 'dolma-making machine', where you simply lay the leaf out, put some stuffing in, and then push a lever to wrap it all up! It took nearly an hour to get good at doing it by hand, and I highly recommend you watch a Youtube video first :) They turned out ok, but the rice wasn't thoroughly cooked, so I will try again another time.

    What was a success, was the massive tray of baked Greek beans. I was pretty lazy and used tins instead of boiling the beans from scratch, but it really didn't matter. They were gorgeous, a sweet and umame counterpoint to the lemony dolmas, and incredibly filling.

    Ingredients:

    • Two medium white onions or one large
    • Two tins of chopped tomatoes
    • 4-6 cloves of garlic
    • a small tin or 4 tbsp tomato puree
    • Three tins of butter beans
    • 1 tsp sugar
    • 1 tsp dried oregano
    • pinch of ground cinnamon
    • a small handful of parsley

    Preheat the oven to 180 C. Finely chop the onion and gently fry in olive oil until translucent - about 6-7 minutes. Crush in the garlic and fry for a further two minutes. Finely chop the parsley and add, along with all of the other ingredients; season well and stir to combine. Tip into a deep baking dish and bake for an hour; the sauce will thicken and the beans will absorb the flavours.

    Saturday 4 May 2013

    Lemon Drizzle Cake

    It was my lovely husband's birthday at the weekend, and I booked a show at the Perth International Comedy Festival - The Pajama Men. As I clicked 'buy', I had a strong sense of deja vu. Checking my email inbox, I found we'd gone to see their show at almost exactly the same time last year. I guess I'm getting stuck in a rut -- but they were hilarious, all over again!

    I asked the SO what he'd like for his birthday cake, and he didn't have a strong preference, so I went for something I'd been craving - LEMON CAKE. Mmmm, just typing it is making me salivate. I went for the lemoniest recipe I could find, and then added more lemon. Unlike their picture, my lemon drizzle ended up soaking into the cake, so I've changed the icing to make what you see on my own photo.

    Ingredients:


    • 225g unsalted butter softened
    • 225g caster sugar
    • 4 eggs
    • finely grated zest 2 lemons
    • 220g plain flour
    • 1½ tsp baking powder
    • juice 1½ lemons
    • 4 heaped tbsp icing sugar
    Preheat the oven to 180C. Cream the butter and sugar together with a whisk and a strong arm, or a food processor. Break in the eggs one at a time and whisk to combine. Add the grated lemon zest and stir again. Sift the flour and baking powder onto the liquid mixture, and use a wooden spoon to fold in, being careful not to overmix and make the gluten strong. Bake for 45-50 minutes, until a wooden skewer comes out clean.

    Combine the lemon juice and icing sugar until you have a slightly thick but still drizzle-able topping, then drizzle it all over the cake.

    Sunday 28 April 2013

    Mechoui Lamb

    Some of our friends have a pomegranate tree, and this year it has produced some lovely fruit, which they were kind enough to bring into the office and give away. The seeds are a lighter pink than the ones I've seen in the store, and they are tart, astringent, and aromatic. I wanted to set them off well in a dish that really needed their sharp, middle-eastern flavour, and as it happened a friend had mentioned this Jamie Oliver recipe for mechoui lamb on Facebook. I bought a whole shoulder of lamb and gave it a go! Verdict: needs improvement.

    The recipe itself is missing half of the ingredients mentioned in the text, which makes it quite confusing reading. 3 hours at 220C was not enough to get my lamb to 'fall off the bone', so what Jamie implied was a little action with a couple of forks turned into a full-on Silence of the Lambs cleaver job, with plenty of swearing and bits of lamb going everywhere. I improvised a roasting rack out of a few stalks of celery, and the resulting broth under the lamb was absolutely heavenly... but the recipe makes no use of it! It was also expensive: the whole thing took around four hours, most of which was spent with the oven on, and the lamb cost around $30, but it only fed two of us, with a little lamb for leftovers. And the spice rub went entirely on to the fat and bone, so was completely wasted. It also seems really odd to have a salad with a meal that you have to eat with your hands. Not to mention it had too much dressing for the surface area of the carrot, so it all ended up at the bottom of the bowl, wasted. Much better to include the salad ingredients IN the flatbread - the flavour combination was great, but Jamie's execution was terrible. So here follows my amended recipe, which I look forward to trying sometime.

    Ingredients:

    • 300g lamb neck fillet
    • 1 tsp ground coriander
    • 1 tsp ground cumin
    • 1/2 tsp chilli flakes
    • 1 orange
    • 1 carrot
    • a handful of fresh mint
    • half a pomegranate
    • a little natural yoghurt (optional)


    Trim off any really fatty bits on the fillet, then rub in the spices. Roast in a 220C oven or bbq on a grill for 15-20 minutes, until cooked but still pink and tender on the inside; turn off the oven and remove the lamb to rest. Meanwhile, deseed the pomegranate into a bowl. Segment the orange over a salad bowl, letting the juices drip in. Peel the carrot and finely julienne with a sharp knife. (If you're in a hurry, you could grate it, but the texture won't be quite right.) Shred the mint and combine with the orange and carrot.

    Pop the flatbreads in the still-hot oven for 30-50 seconds, until hot. Slice the rested lamb into thin disks and toss with the carrot and orange, then pile into the flatbreads and top with pomegranate seeds, and yoghurt, if using.

    Wednesday 24 April 2013

    Spicy Potato-stuffed Green Peppers

    Back in March we had a wonderful visit from friends from the UK :) Amongst the fun of visiting Fremantle, Rottnest, Margaret River and generally pottering about and playing games, we had time to cook a few favourites: lamb abruzzio, T-bone steaks with salad and BBQ'd potatoes, and of course, lots of kangaroo!

    Since then I've been a bit swamped by work, and under the weather from the 'winter'. We've had lots of old favourites and fallbacks, like that wonderful chicken, orange and almond salad. I just started getting the cooking bug again this week, but I'll be away for work next week! So I thought I'd better update while I had a little enthusiasm.

    This recipe came originally from The Flavour Thesaurus, under the 'peppers and chillis' combo. I didn't actually get much of a taste of the chilli in this - yes, it was spicy, but it didn't have that kind of jalapeno-like aroma to it. What I really liked was the savoury contrast of the spiced potato with the fresh green peppers. All it needs is a touch of sweetness to round it all out. You could serve it with some sweet chutney, or some peshwari naan. I made gajar ka halwa to go after, but it was too sweet, too late. Next time perhaps I'll cook the carrots with fenugreek and a little honey, and have them with, instead.

    Ingredients:

    • 2-4 large to medium green peppers
    • one large white onion
    • 4-5 mashing potatoes
    • 2-3 tsp garam masala
    • a whole chilli (optional)
    • butter, ghee or oil
    • sour cream or yoghurt
    • 1tsp paprika

    Halve and deseed the peppers, then grill or microwave, cut-side down, until beginning to go tender. Arrange in a roasting tin or baking dish, cut-side up. Meanwhile, scrub and boil the potatoes, and finely chop and gently fry the onions and chilli, until golden and sweet. Mash the potatoes and stir into the onions, with the garam masala. Spoon into the green peppers and top with a little butter, ghee or oil. Roast at 180C for 20 minutes, until the green peppers are soft and the tops of the potatoes are golden. Stir the paprika into the sour cream or yoghurt and serve the peppers topped with a blob.

    Tuesday 26 February 2013

    BBQ Sweet Potato and Caramelised Onion Pie

    I tried making a tarte tatin on the BBQ the other day, but found the heat was so intense that the onions and tomatoes cooked too well, resulting in a pie too dark and bitter to really enjoy as intended. For this creation I got the quantities and times just right, but you might want to keep an eye on yours, as BBQs vary considerably in temperature.

    Ingredients

    • a medium sweet potato
    • a large white onion
    • balsamic vinegar
    • a handful of fresh thyme or oregano
    • a sheet of ready-made puff pastry

    Using a mandolin or very sharp knife, cut the sweet potato into 5-8mm discs. Brush lightly with olive oil and cook on a bbq hot-plate or grill for 2-3 minutes each side, until just cooked through and going golden. Finely slice the onion into rings or half rings and gently fry in a bbq-safe cast-iron skillet, until the raw freshness has gone - about 2-3 minutes - then remove from the heat. Shred over the fresh herbs, then drizzle with 2-3 tbsp of balsamic vinegar, and season with salt and pepper. If the vinegar evaporates because the pan is too hot, add 1/2 tbsp more, and a little water. Layer over the sweet potato discs, seasoning with salt and pepper each layer. Finally, cut the puff pastry to fit your pan and place on top. BBQ for 15-20 minutes, until the pastry is risen and golden, and the onions have cooked into a delicious caramelised base. Serve with greens or a salad.

    Wednesday 13 February 2013

    BBQ Stuffed Potato Skins

    I'd been craving this for a while, for some reason. They were a meal in themselves - although we had a little side salad to offset the sheer decadence of the carb-fat-bacon-tastic skins :)

    Ingredients

    • six medium roasting or baking potatoes
    • 4 full rashers of bacon (or 8 streaky, or 3 back)
    • a small bunch of chives or two spring onions
    • 100ml sour cream
    • 120g cheddar or soft blue cheese

    Put the potatoes in a pot just large enough to take them all, and top up with boiling water. Simmer for 15 minutes, until just soft enough to pierce with a fork. Remove and allow to cool for 10-15 minutes. Meanwhile, BBQ, grill or fry the bacon until crispy, then crumble; finely chop the chives or spring onions. Slice the potatoes in half lengthwise and scoop out the cooked flesh, putting it in a glass bowl. Leave a 2-10mm border of cooked potato in the skins, and try not to tear them.

    Mash the potatoes and sour cream together in the bowl; stir in the chives/onions and crumbled bacon. Spoon back into the skins, packing the mixture in well. Top with a little grated cheddar or a knob of soft blue cheese. Brush a hot BBQ plate with olive oil and pop the potatoes on for 5-10 minutes, until the cheese has melted and the skins are crispy. (Alternatively, put in a hot oiled roasting tin and roast for 10-15 minutes.)

    Tuesday 12 February 2013

    Shaved Courgette Salad

    I've tried using courgettes in salads for years, always with disappointing results. What I realised recently is that depending on how you slice courgettes, they can either be very watery and limp or crisp and refreshing - cucumber behaves similarly. I believe it's dependent on what the slicing method does to the cell structure, which I surmise must be fairly fragile. Grating courgette bruises the cells and causes lots of water to be released, which is fine if you want to squeeze the shreds out and use them in, say, a cute little fried vegetable cake. For a salad, the perfect way to prepare them is to use a sharp vegetable peeler: hold the courgette upright, and use the peeler to make long thin strips, until you hit the seedy core. Rotate the courgette by ~30 degrees and peel again, until all you're left with is the seedy core, which you can eat raw or discard.

    The rest of this salad follows naturally: a heady mix of balanced flavours which would work well as a side dish to anything, or even as a centrepiece with some quality serrano ham (or a strong, rinded goat's or brie-like cheese) and good crusty bread. The smaller the courgette you use, the more flavourful it will be, and the less core there will be to discard.

    Ingredients:

    • a few large sprigs of mint
    • half a lemon
    • 2 tbsp capers
    • 3 baby or 1 medium courgette
    • olive oil


    Rinse and finely chop the mint. Zest and juice the lemon. Peel the courgettes into long thin strips. Combine the courgettes, mint, lemon and a few glugs of olive oil. Season with salt and peper and scatter over the capers. Serve immediately.

    Sunday 10 February 2013

    Cold Noodle and Tomato Salad

    Ironically, the last time I made this was on the hottest day of the year in Cambridge. I think it cracked 28C? Seems very funny in retrospect :)

    I just survived my first 40C+ day of the year (I missed the worst while I was away for Xmas), and this salad was as appealing as ever! I threw in a yellow pepper instead of red, cashews instead of peanuts, a few different kinds of tomatoes, and mung bean sprouts instead of broad beans. The essential Thai dressing still soaked into the cold noodles and gave the whole thing that refreshing crisp taste that momentarily makes you forget that you ever felt hot.

    Also, happy birthday to my lovely middle sister, for whom I promised a recipe website as a birthday present many years ago, and I hope is now enjoying a lovely day :)

    Saturday 9 February 2013

    Sweet Potato and Bacon Frittata

    The Internet told me to make this one. It was the end of the week, and we were running low on food, and the two things I needed to use up most were a large sweet potato, and a packet of bacon. So I typed 'sweet potato bacon' into Google, and auto-complete immediately suggested 'frittata recipe'. So I went for it! And it turned out wonderfully :) I also served it with a quick courgette ribbon salad from a blog that I simply cannot find again, but I'll cover that in another post.

    I think grilled green pepper or even some okra would work better than peas; I might try that next time.

    Ingredients:

    • a medium sweet potato
    • 3 full (or 6 streaky, or 4 back) bacon rashers
    • 6 eggs
    • 3/4 cup of frozen peas
    • 25g cheddar
    • 1 tsp paprika

    Preferably using a mandolin, but a sharp knife and a steady hand will do, slice the sweet potato into 3mm rounds. Brush them lightly with oil and bbq them with the bacon; if you can fit them all on the grill, it should take about 8 minutes.

    Meanwhile, break the eggs into a large bowl and whisk in some bubbles of air. Drop in the frozen peas. When the bacon is done, shred it finely and add it to the eggs and peas. When the sweet potatoes are done, make a layer of sweet potato discs at the bottom of an oiled, medium cast-iron skillet. Pour in half the egg mixture, then add another layer of sweet potatoes, then the remaining egg mixture, and then a final layer of sweet potatoes. Grate over the cheddar and sprinkle over the paprika. Cook on the bbq hot plate for a further 10-15 minutes, until set and coming away from the sides.

    Any extra sweet potato discs are fantastic to snack on with a sprinkling of coarse salt.

    Thursday 7 February 2013

    Chicken and Lemongrass Patties

    Got home from Zumba and needed a fast, protein-rich meal. Whizzed a stalk of lemongrass and a handful of mint in the new blender and combined it with 500g of chicken mince, then formed the mix into small patties and bbq'd them for 3 minutes a side. Egg-fried some rice and topped the lot with a dipping sauce of soy sauce, sweet chilli sauce and the juice of a lime. That's what I call fast food!

    Monday 4 February 2013

    Lazy Stuffed Peppers with Gorgonzola

    Peppers are coming into season as the weather properly warms up, so I started looking around for recipes to use up the inevitable giant cheap bags at the market. I found this rather fiddly recipe that had an interesting flavour combination I hadn't tried before. I knew I couldn't be bothered with all that string nonsense, and doubly so when we found a big $1 bag of sweet pointed peppers just beginning to wrinkle into overripe territory. So we skipped all that stuffing malarky, and just bbq'd the peppers into tender, charred strips, made the stuffing separately and laid it over the top. Lovely!

    Ingredients:
    • 6 pointed or 4 bell peppers
    • 50g pine nuts
    • 2 garlic cloves
    • 140g long grain rice
    • 350g vegetable stock
    • 4 spring onions
    • 2 tomatoes
    • handful each of parsley and basil
    • 150g gorgonzola
    Slice the peppers lengthwise and remove all the pith and seeds, but leave the stems on. If you are using large round bell peppers, slice them into thirds so that each piece can lie flat on the bbq. BBQ or grill for 5-20 minutes, skin-side-down, until the flesh is sweet and the edges are charred (the cooking time will depend strongly on the thickness and ripeness of the peppers, and the heat of your grill or bbq).

    Meanwhile, dry-fry the pine nuts until golden, then set aside. Heat a little olive oil in a frying pan and crush in the garlic, then tip in the rice thirty seconds after it starts to sizzle. Stir, fry for a further thirty seconds, then pour in the stock; cover and simmer until the rice is cooked. Finely dice the spring onions and herbs, and dice the tomatoes, then stir into the rice, replacing the lid to let everything wilt a little, and the flavours mingle.

    When the peppers are done, place them on a serving plate, skin-side-down. Dice the Gorgonzola and stir it, and two-thirds of the pine nuts, through the rice, but don't completely combine the cheese; allow little pockets to remain. Tip the stuffing onto the peppers and scatter with the remaining pine nuts, and a few torn leaves of basil.

    Saturday 2 February 2013

    Steak and Chinese Greens

    Anther Nigel suggestion: a pan-fried steak atop a bed of Chinese greens with a splash of sweet chilli sauce. Maybe I just didn't 'get' this combination, but I found that a properly-made Thai beef salad takes these flavours and brings them to their proper, lip-stinging height. Admittedly, this was a lot faster to make, but aside from the improved flavours, you can also stretch a nice cut of beef a lot further if you spend the time to make a nice dressing and add some more interesting vegetables. On the plus side, the Malaysian 'Lobster Crackers' (100% prawn, flour and salt!) from the combined grocers' were excellent. Nige didn't suggest a carb and since we'd already combined Thai and Chinese flavours, we improvised! Then headed out to a cool free art display on the Canning River. Took our lobster crackers but they were too noisy to eat, so we got sloshed on homemade ginger beer instead.

    Saturday 26 January 2013

    Tabbouleh

    I combined a couple of tabbouleh recipes to generate this delicious accompaniment to some freshly-grilled lamb chops from the butcher's. It's really important to have some good fresh herbs to hand; you can't substitute or reduce them without reducing this from tabbouleh to a mere cous-cous-with-bits-in. On the other hand - you can totally substitute cous-cous, if you don't have time to cook bulghur wheat or just don't fancy the flavour.

    Ingredients:

    • 75g cous-cous
    • a slice of butter
    • 1/2 tsp vegetable stock powder
    • two ripe red tomatoes
    • a couple of hot radishes
    • a spring onion
    • a good handful of flat-leaf parsley
    • a good handful of fresh mint leaves
    • juice of half a lemon
    • olive oil

    Pour boiling water over the cous-cous in a 2:1 water:cous-cous ratio and stir through the butter and stock powder; microwave for a minute or two then leave to stand to cook through. Cool if you have time. Dice the tomato and radishes; finely chop the spring onion and herbs. Combine the cooked cous-cous, herbs, tomatoes, radishes and lemon juice, then drizzle with olive oil just before serving.

    Friday 25 January 2013

    Aubergine and Caramelised Onion Pasta

    I tried another recipe from Nigel Slater's Kitchen Diaries II, and overall I'd say it wasn't bad. After  agonising over the right pasta shape for a few paragraphs, before settling on one I've not seen for sale down under, he suggests basking the aubergine whole, then scraping out the cooked flesh, whipping it with olive oil to make a pasta sauce.

    I found that compared to my usual method, this takes a very long time, and the insides get steamed instead of grilled, so are missing all of the lovely charcoal-y edgy bits that make cooked aubergine so extra delicious, on top of the meltingly soft, subtle flesh. Plus you have to throw away the skin, which is another flavour & texture combo I relish. I think his recipe would be much faster and tastier if you simply sliced the aubergines, brushed them lightly with olive oil, bbq'd them over a hot grill; meanwhile caramelise some onions, then tear the aubergines into pieces and toss everything together with basil, freshly cooked pasta, and a good squeeze of lemon. Punchier, faster, less greasy, and preserving all the best flavours of the aubergine. I'll report when I've had a go with my modifications.

    Wednesday 23 January 2013

    Okonomiyaki (Japanese Savoury Pancake)

    Another inspiration from my amazing Flavour Thesaurus, with guidance from one of my favourite food blogs and a helpful Japanese cooking info page. This time I was reading the underwhelming-sounding 'cabbage and egg' section. Turns out the Japanese have a long tradition of making these gorgeous savoury pancakes with a range of different ingredients, but almost-always including shredded cabbage as the base. And since cabbage was on my list of 'cheap veg at the market this week', I have a whole head to use up. I made up the money saved buying the cabbage by buying beautiful katsuobushi, the dried bonito flakes that 'dance' in the convection currents generated by the hot pancake. I also made my own okonomiyaki sauce, which meant I had to buy ketchup for the first time in my life. Oh well - maybe when winter rolls around I'll deep-fry some potato chips. Or, more likely, I'll just make these again, because they were AMAZING! Even easier to flip than Korean pancakes, less fiddly than fried veggie fritters, and absolutely divine in flavour. I think it's worth putting in the extra effort to make the sauce, and track down the katsuobushi and wakame (dried seaweed).

    Ingredients
    What is so exciting about this seaweed??
    For the pancake: 
    • 1/4 white/green cabbage
    • 1 carrot
    • 2 spring onions
    • 1 egg
    • 3/4 cup room-temperature dashi stock (substitute seafood stock, or vegetable stock, or even water)
    • 1 cup plain flour

    For the toppings:

    • 2tbsp ketchup (tomato sauce)
    • 2tbsp Worcestershire sauce
    • 1 tsp dark soy sauce
    • 1 tsp sugar
    • 2 tbsp mayonnaise
    • 50g katsuobushi (fine bonito flakes)
    • a small handful of wakame (dried seaweed)
    Japanese pancake on the barbie.
    Now that's what I call fusion food :)
    Shred the cabbage, grate the carrot and finely slice the spring onions. Combine with the egg, stock and flour in a large mixing bowl. Get a bbq hot plate nice and hot and brush generously with oil. When you can see it start to shimmer, plop the mixture onto the hotplate and push down and smooth out to make a pancake or two (how many depends on your confidence in your ability to flip them!). Close the lid and bbq for 5-10 minutes, until crisp and golden on the bottom, and cooked through enough not to fall apart when you lift the edges with a spatula. Flip onto the other side and cook for a further 5-10 minutes.

    Meanwhile, combine the ketchup, Worcestershire sauce, soy sauce and sugar in a small bowl, to make the okonomiyaki sauce. Put the mayonnaise in a small plastic bag with the corner cut off, or piping bag, if it's not in a squeezy bottle already. When the pancake is nearly done, turn off the heat and brush the top surface with the okonomiyaki sauce. Pipe on the mayonnaise in long lines, or whatever pattern you like. Tip on the katsuobushi and scatter with a handful of wakame. Serve hot off the grill, with the bonito flakes dancing to their tasty song :)

    Tuesday 22 January 2013

    Roast Green Peppers with Giant Cous-Cous

    Green peppers have a hard time competing with their red, orange and yellow brethren. Chefs are full of admonitions to 'never ever' substitute green peppers for red, and it's understandable: the flavour is noticeably different, being less sweet and grassier. However they're indispensable for the gorgeous lamb abruzzio and a staple of my Mexican cooking. Tonight I wanted to try stuffing and roasting them, but using flavours which would complement their green taste. I used a Nigel recipe for inspiration, but like the risotto I made earlier in the week, substituted most of the ingredients. To figure out the flavours, I started with the 'abruzzio' flavours, then subtracted the lamb (I try to eat veggie on days when I'm not exercising) and replaced its umameness with a little anchovy.

    If you can't get giant cous-cous (and I have to say, I was amazed to find it in my local market), I'm sure normal cous-cous would work just fine. You would, however, miss out on the joy of the escapee giant cous-cous, which leap from the peppers onto the hot roasting tray, and bake through to produce joyous bonus crunchy popcorn-like additions. This recipe makes enough for two hungry people, or in our case, enough for dinner and then lunch the next day.

    Ingredients:

    • 200g giant cous-cous (also called pearl cous-cous, or mograbiah)
    • six spring onions
    • a large handful of mint
    • six large salted anchovy fillets
    • 10-12 olives
    • four medium to large green peppers
    • half a lemon
    • 100ml sour cream
    • 1 tsp paprika


    Cook the cous-cous according to its packet instructions; mine didn't have any but took about 20 minutes to become tender. Finely chop the spring onions and fry in a little olive oil until softened. Zest the lemon, chop the mint, halve the olives, and crumble the anchovies; turn off the heat and add them all to the spring onions, then season with black pepper. (You probably won't need salt because of the olives and anchovies.) Drain and tip in the cooked cous-cous and squeeze over the lemon, then gently combine.

    Cut the peppers in half and remove the seeds and pith, but leave the stalks on. Lay out in a large baking tray and fill with the cous-cous combination. Cover loosely with foil and roast in a 200C oven or on a hot bbq for 35-40 minutes, until the peppers are cooked through and beginning to caramelise at the edges. Stir the paprika through the sour cream and serve with the cooked peppers.

    Monday 21 January 2013

    Pumpkin Pangrattato

    Pumpkin was cheap at the market. Turns out that's because it has almost zero flavour at this time of year (midsummer). I have written down the basic recipe, which comes from Nigel's Tender, a book I have struggled to use well since it's aimed at someone growing vegetables in a much more temperate climate. I certainly remember the pumpkins in Cambridge being sweeter than the sad specimen I cooked tonight. Anyway, I include in italics the ingredients to include if you suspect your pumpkin is lacking a certain joie de vivre. And I'm toning down the amount of chilli: we had to have a yoghurt afterwards to cool down!

    Ingredients:

    • 750g pumpkin or butternut squash
    • 3 cloves of garlic
    • 1/4 tsp dried chilli flakes
    • 1 1/2 tbsp rosemary leaves
    • zest of an orange
    • a handful of parsley leaves
    • four handfuls of breadcrumbs
    • 2 tsp sugar
    • 1/2 tsp ground cinnamon
    • 1/2 tsp salt
    • 1/4 tsp nutmeg
    • 40g butter
    • segments of an orange
    Peel and deseed the squash, then cut into ~2cm pieces. Steam for 15-20 minutes until just tender. Crush the garlic into a frying pan with some olive oil and fry gently until just beginning to colour. Meanwhile, finely chop the rosemary and parsley leaves, and zest the orange. Add the herbs, chilli and orange zest to the garlic, then tip in the breadcrumbs and mix well; fry for a further 3-4 minutes until fragrant and just beginning to crisp.

    Tip the pumpkin into a large roasting tray and taste; if it's lacking in flavour then season with the sugar, cinnamon, salt and nutmeg. Tip over the breadcrumbs and dot with butter. Roast at 180C or on a moderate bbq for 35-40 minutes until the crumbs are deep gold and the pumpkin is tender. If you like, stir through the orange segments before serving.

    Friday 18 January 2013

    Mung Bean Sprout Risotto

    A strange-sounding combination, to be sure. It started out as an entirely different recipe - 'A risotto of spelt and pea shoots'. Then I attempted to obtain the ingredients from my local market:

    Nigel: Now easily available from supermarkets and grocer's, this ancient grain has an extraordinary comforting quality.
    Me: Do you have pearled spelt?
    Shelf-stacker: *blank look*
    Me: It's like spelt - but before it's been ground into spelt flour...
    Shelf-stacker: We have pearl barley...
    Me: Thanks...

    I didn't even try for pea shoots. Pea shoots? Really? And Nigel grows them himself in a tray? How much time does this man have to wash things? I picked up a pack of mung bean sprouts and hoped for the best.

    The remaining ingredients were an onion - substituted with a shallot - and vegetable stock - replaced with an amazing chicken stock we'd made with the chicken carcass at the weekend. OK - I didn't substitute the Parmesan or butter... cheddar and lard just didn't sound right!

    Anyway, it turned out surprisingly well. Strangely nobbly complementary textures. It was very easy - just make the simplest onion and rice risotto base and then stir through mung bean sprouts at the end... I suspect the recipe might have been lost in substitution!

    Thursday 17 January 2013

    Bacon and Chilli Yoghurt Muffins

    I'm in a muffin mood! Specifically I seem to be hooked on bacon muffins. SO GOOD. This recipe comes from an awesome Christmas present, The Flavour Thesaurus. It's an incredible book in which the author set out to describe every possible flavour combination, scaling back from an insane number that could only be represented in scientific notation to a 'more feasible' 4,591 combinations - of which, to be fair, only the edible ones are described. It's brilliant to flick through as the prose is amusing and filled with interesting historical and cultural tidbits- it was in the 'everything goes with bacon' chapter that I came across this lovely recipe. I didn't have any cornmeal, so in place of the plain flour and cornmeal, I used a 'corn bread' baking mix, which is half-and-half white flour and coarse corn meal flour. Don't be scared by the quantity of chilli flakes: their heat is well-tempered by the yoghurt and butter. I also took the advice in the recipe and served with cream cheese: a wonderful combination.

    Ingredients

    • four rashers of bacon
    • two eggs
    • 450g plain yoghurt
    • 50g butter
    • 1 tsp salt
    • 1 1/2 tsp bicarbonate of soda
    • 65g plain flour 
    • 275g fine cornmeal
    • 1 tsp dried chilli flakes
    Fry or grill the bacon until crispy and easy to snip or crumble. Whisk the eggs together with the yoghurt in a large mixing bowl. Melt the butter and drizzle it in, whisking all the while. Combine the salt, soda, flour, cornmeal and chilli flakes in a bowl and then fold into the yoghurt mixture, stopping as soon as you no longer see any dry flour. Pop into 12-18 muffin cases or trays and bake at 200 C for 20 minutes, until golden and risen.

    Wednesday 16 January 2013

    Sticky BBQ Chicken Wings

    Another one from Nigel; I popped the jointed chicken wings and legs into a bowl and immediately covered with the marinade. Refrigerated, they were happy for four days, after which the marinade had completely permeated the chicken.

    Ingredients:
    • two chicken wings and two chicken legs, or roughly the same quantity of whatever chicken pieces you have to hand
    For the marinade:
    • 1 tsbp light soy sauce
    • 1 tbsp lime juice
    • 1 tbsp fish sauce
    • 1 clove of garlic
    • half a stalk of lemongrass
    • 1 tsp sugar
    For the dipping sauce:
    • 1 1/2 tbsp fish sauce
    • 1 1/2 tbsp rice vinegar
    • 3 tbsp white sugar
    • half a thumb of ginger
    • 1 chilli (optional)
    • juice of a lime
    Crush the garlic and finely slice the lemongrass, then mix together with the other marinade ingredients; cover the chicken pieces and refrigerate for 1-100 hours. For the dipping sauce, finely dice the chilli and grate the ginger into a very small saucepan, and add the other ingredients. Heat gently to dissolve the sugar, then take off the heat.

    BBQ the chicken pieces for 15-20 minutes, until cooked through and crispy at the edges. Serve with the dipping sauce, over plain steamed rice with some stir-fried vegetables.

    Monday 14 January 2013

    BBQ Aubergine with Garlic Mayonnaise

    I'm still recovering from the flu, so I gave this 40-minute recipe to the SO to do... so of course it took a good two and a half hours, and I had to take over at the end... good job he doesn't read this blog ;) I ended up making the mayonnaise because he didn't check whether we had mayonnaise before we began, which in the end turned out well: I'd been looking forward to making my own mayonnaise for some time, just never expected to do it while exhausted with the flu! Turns out the key is patience. The SO's method of putting-all-the-ingredients-in-one-bowl-and-using-a-blender just results in a broken blender. Stay calm and keep dripping oil.

    Ingredients
    • a large aubergine
    • a head of garlic
    • an egg
    • 65-75ml of olive oil
    • 1/4 tsp salt
    • 1/2-1 tsp lemon juice
    • 1-2 tbsp capers
    • a few leaves of basil

    Wrap the garlic in foil and drip in some olive oil; roast in a hot oven or on the bbq for 40 minutes, until cooked through and soft. Slice the aubergine lengthwise into long fat slices and grill (preferably on the hot bbq :) for 10-15 minutes, until meltingly soft in the middle and beginning to crisp on the edges.

    Meanwhile, separate the egg and discard or save the white for something else, plopping the egg yolk into a large bowl. Drip no more than three drops of olive oil into the yolk and whisk until it is completely combined and lightened. Drip in a couple more drops and repeat. Continue this process, increasing the number of drops very gently as you proceed. It will slowly turn into mayonnaise! Whisk in the salt and lemon juice at the end, adding the lemon juice again in small quantities. Squeeze the garlic cloves out of the head and whisk into the mayonnaise. Serve with the hot grilled aubergine slices, and garnish with capers and torn basil.


    Sunday 13 January 2013

    Baked Chicken with Tomatoes and Olives

    We bought a whole chicken this week, which contributes to over half of the meals in the week: a hearty chicken stock for a perfect risotto, the bony wings and legs for some finger-licking marinaded bbq goodness, and the thighs and breasts for a big bbq'd tray of goodies which easily serves us for two nights. I went for a very calm carb to contrast the strong, acidic flavours: a handful of breadcrumbs fried in olive oil stirred through some tiny pasta, for a nice contrast in textures.

    Ingredients:

    • Two chicken breasts and thighs, or 500g of chicken pieces
    • five large tomatoes
    • a small lemon
    • a generous handful of olives
    • half a head of garlic

    Cut the tomatoes into quarters and pit and halve the olives. Peel the garlic and crush lightly; halve if large. Pop the chicken, tomatoes, garlic and olives in a large roasting tray, squeeze over the juice of the lemon, and season with salt and pepper. Roast (~200C) or bbq (moderate) for 30-35 minutes, until the chicken is cooked through and the tomatoes are blackened at the edges.

    Saturday 12 January 2013

    Bacon, Cheese and Apple Muffins (oh my!)

    I received some lovely presents from my husband's brother and his wife: the sequel to one of my favourite cookbooks, The Kitchen Diaries, aptly titled The Kitchen Diaries II (: the Search for More Food?!), and some delightful silicone muffin cups and a matching tray. I put them both to the test with this simple recipe, about all I could manage while coming out the other side of the Great British Flu, a gift the entire Northern Hemisphere contributed to. They turned out really well, despite having to substitute plain old free-range bacon and Australian cheddar for the ridiculously artisanal ingredients used by Nige.

    Ingredients:
    • four rashers of back bacon
    • a small apple
    • 3 eggs
    • 175ml yoghurt
    • 100g cheddar cheese
    • 2 tsp baking powder
    • 1 tsbp sugar
    • 275g plain flour

    Pop the bacon on the barbie or under the grill until cooked but not too crispy, then snip into small pieces. Beat the eggs into the yoghurt, then grate 3/4 of the cheese into the mixture. Combine the baking powder, sugar and flour in a separate bowl. Peel and grate the apple last, so it has no time to go brown. Stir it, along with the bacon, into the yoghurt mixture. Fold the yoghurt mixture gently into the flour, stopping as soon as there is no more dry flour visible. Spoon into muffin cups (I used 12), and bake at 200 C for 20-25 minutes, until risen and golden. Nigel says to eat them on the same day, but I found the taste improved overnight, although the texture suffered a little.

    Sunday 6 January 2013

    Pasta with Meatballs

    My last meal of Being Twenty-Nine Years Old: a big classic in our family, but we all have slightly different ways of making it. My mum drops pure-mince meatballs into the tomato sauce, letting them cook through as the sauce thickens on the stove; I use fried or baked meatballs containing bread (I love the crispy crust!). My sister likes to stir the spinach into the sauce and scatter feta over the top; I prefer it to combine cooked, wilted spinach with ricotta and leave little quinelles throughout the bake. However, I think we can all agree that penne is exactly the right pasta for this dish, and that it tastes even better the next day. Although maybe not in my case, what with my taste buds suddenly going over the hill...

    Here's my version.

    Ingredients

    • 1kg of meatballs
    • 500g tomato sauce (or double, if you like it very tomato-y)
    • two large bunches of fresh spinach, wilted and chopped or 250g frozen chopped spinach, defrosted
    • 250g of ricotta cheese
    • 1/2 tsp nutmeg
    • 1/2 tsp salt
    • 500g dried penne, cooked according to the packet instructions
    • 100g Cheddar or Parmesan, grated


    Combine the spinach, cheese, nutmeg and salt together in a bowl. Stir the pasta with the tomato sauce and meatballs and pour into a large baking dish. Using two large tablespoons, take scoops of the ricotta/spinach mixture and push little quinelles into the dish. Scatter over the grated cheese and bake for 25 minutes at 180 C, until golden brown on top and piping hot throughout.